
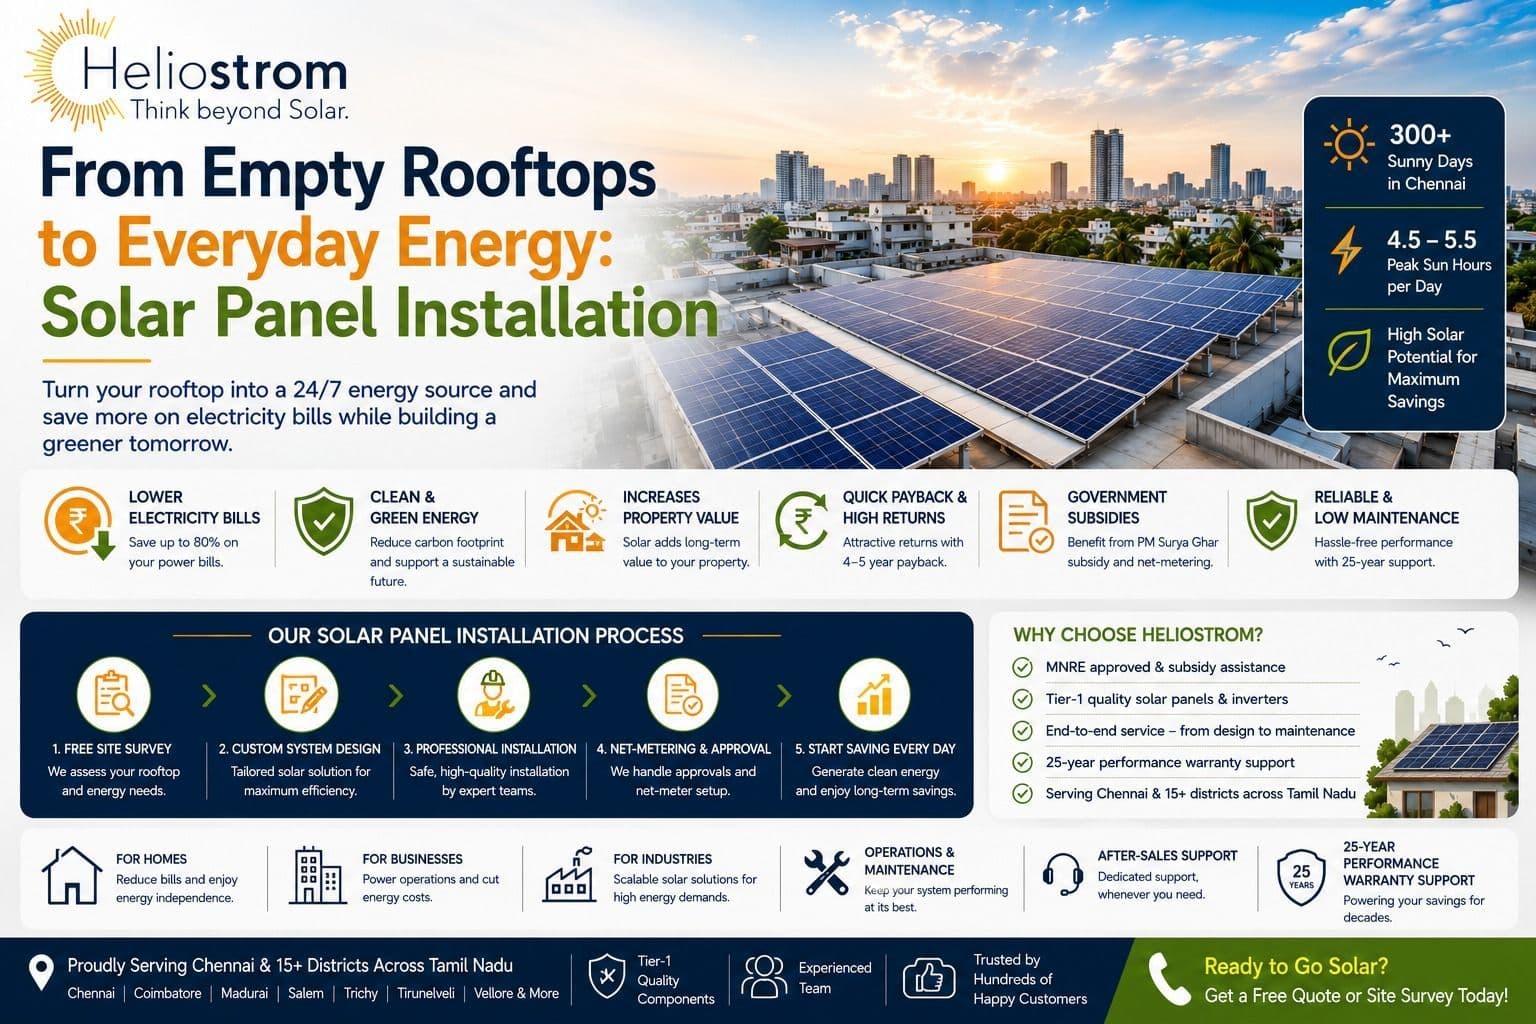
Most rooftops sit empty -bare concrete exposed to the sun for hours a day, doing nothing but absorbing heat. Turning that unused space into a source of everyday power is exactly what Solar Panel Installation makes possible. What used to be a niche investment for early adopters has become a mainstream home upgrade in 2026, backed by the PM Surya Ghar Muft Bijli Yojana and MNRE’s grid-connected rooftop solar programme, falling equipment costs, and rising grid tariffs. This guide walks through exactly how a rooftop goes from empty to energy-generating -the process, the panel choices, the costs, and what to expect once your system is switched on.
Why Homeowners Are Turning Rooftops Into Power Plants
Rising Electricity Bills and Grid Dependence
Domestic electricity tariffs vary widely by state, slab, and DISCOM, and higher-use households often face higher effective per-unit costs, and slab-based billing means high-consumption households often pay a disproportionately larger share per unit. A rooftop solar system shifts a portion of daytime consumption away from the grid entirely, which is why homeowners with air conditioners, electric vehicles, or larger families are often the first to see meaningful bill reductions.
The Push Toward Clean, Self-Generated Energy
Beyond cost, more homeowners are treating solar as basic infrastructure rather than a lifestyle statement -similar to a borewell or an inverter backup. A well-designed system can offset a substantial share of daytime household consumption, depending on roof space, usage pattern, and local solar conditions, and with the right net metering setup, surplus generation is credited back against future bills instead of going to waste.
How Solar Panel Installation Works: From Roof Assessment to Power-On
Step 1: Site Survey and Energy Audit
A qualified installer starts by reviewing your last 6–12 months of electricity bills to estimate average consumption, then physically inspects the roof for usable area, orientation, shading from trees or neighboring buildings, and structural condition. This step also includes checking your existing electrical panel's capacity, since older wiring or an undersized main board may need an upgrade before installation can proceed.
Step 2: Choosing the Right Panel and System Type
Based on available roof space and monthly consumption, the installer recommends a system size (typically measured in kW) and a configuration -on-grid, off-grid, or hybrid. Most urban homes with a stable grid connection opt for an on-grid system, which is simpler, cheaper, and eligible for net metering and subsidy benefits; hybrid systems add battery backup for homes that also want power during outages.
Step 3: Mounting, Wiring and Inverter Setup
Installation crews fix an aluminium mounting structure to the roof, angle the panels for optimal sun exposure, and connect them in strings using MC4 connectors before running DC cabling to a solar inverter. The inverter converts the DC electricity generated by the panels into the AC power your home appliances actually use, and is typically mounted in a shaded, ventilated spot close to the main electrical panel. Proper earthing and lightning protection are added at this stage to meet local safety codes.
Step 4: Net Metering, Inspection and Commissioning
Once wiring is complete, the installer applies to your electricity distribution company (DISCOM) for a net meter, which tracks both the power you draw from the grid and the surplus you export back to it. A DISCOM technician typically inspects the installation before approving commissioning. From that point, your system is live, and any subsidy claim under a scheme like PM Surya Ghar can be submitted using the commissioning certificate.
Choosing the Right Solar Panels for Your Home
Monocrystalline, TOPCon, and Bifacial: What's the Real Difference
Monocrystalline panels remain the residential standard, typically delivering 20–23% efficiency and a 25–30-year service life, which makes them the practical choice for most rooftop installations with limited space. Newer N-type TOPCon panels push efficiency to roughly 22–25% and degrade more slowly over time, often at a modest price premium. Bifacial panels, which generate power from both sides, can boost output by 15–30% -but that benefit mostly applies to ground-mounted systems with reflective surroundings; on a standard dark rooftop, the added cost rarely pays off, so they're not usually the right fit for a typical home installation.
On-Grid, Off-Grid, and Hybrid Systems
On-grid systems stay connected to the utility grid and are the default choice for most homes because of their lower cost and eligibility for net metering. Off-grid systems run entirely on batteries and suit locations with unreliable or no grid access. Hybrid systems combine both -grid-connected with battery backup -giving homeowners protection against outages without the full cost of going fully off-grid.
Cost, Subsidy, and Payback: What Homeowners Should Know in 2026
PM Surya Ghar Muft Bijli Yojana: Subsidy Slabs Explained
Launched in February 2024 with a ₹75,021 crore outlay, the PM Surya Ghar Muft Bijli Yojana remains the primary reason residential solar has become affordable at scale in India. The central subsidy works out to ₹30,000 per kW for the first 2 kW and ₹18,000 for the third kW, capped at a maximum of ₹78,000 for systems of 3 kW or larger. The subsidy is transferred directly to the beneficiary’s bank account after successful installation and verification -it isn't an upfront discount, so households need to fund the installation cost first and claim the subsidy afterward. Panels and vendors must meet MNRE and scheme compliance requirements, including approved registration and documentation to remain subsidy-eligible, so it's worth confirming this with your home solar panel installation provider before signing a contract.
Typical Installation Cost and Break-Even Period
A 3 kW residential system -enough for a moderate household -commonly costs in the range of roughly ₹1.9–2.1 lakh before subsidy in 2026, bringing the net cost down to around ₹1.1–1.3 lakh after the maximum ₹78,000 subsidy is applied. Most homeowners recover this investment within four to six years through reduced electricity bills, with 20-plus years of largely free generation remaining on a typical 25-year panel warranty.
Maintenance and Long-Term Performance of Rooftop Solar Systems
Rooftop solar has very few moving parts, which keeps maintenance simple compared with most home appliances. Panels generally need periodic cleaning to remove dust, pollen, or bird droppings -more frequently in dusty or high-humidity regions, where soiling can otherwise reduce output by a few percentage points. Inverters, which do the heavy electronic lifting, typically carry a 5–10-year warranty and may need replacement once during a system's 25-year life. An annual check of wiring, mounting hardware, and inverter performance data is usually enough to keep a system running at its rated output If you're unsure what maintenance schedule suits your specific setup, ...it's worth learning more about residential solar panel installation requirements to understand the maintenance plan best suited to your system size and location. Common Mistakes to Avoid During Solar Panel Installation
- Skipping a proper shading and structural assessment, which leads to underperformance or roof issues later
- Undersizing the system to save upfront cost, resulting in smaller bill savings than expected
- Choosing panels or inverters not listed on the government's approved manufacturer list, risking subsidy rejection
- Delaying the net metering application, which pushes back commissioning and subsidy disbursement
- Ignoring routine cleaning and inspection, letting avoidable output losses accumulate over time
Frequently Asked Questions
How long does solar panel installation take for a typical home?
Physical installation usually takes one to three days for a standard residential system, depending on size and roof complexity. The full process -including site survey, approvals, and net meter commissioning -typically spans four to eight weeks.
Do I need to replace my roof before installing solar panels?
Not usually, but if your roof is within a few years of needing repair or replacement, it's worth addressing that first. Removing and reinstalling a solar array later adds significant extra labour cost.
How much subsidy can I get under PM Surya Ghar Muft Bijli Yojana?
Eligible households can receive up to ₹78,000: ₹30,000 per kW for the first 2 kW and ₹18,000 for the third kW, for systems of 3 kW capacity or larger. The subsidy is credited directly to your bank account after DISCOM commissioning.
What is net metering and do I need it?
Net metering is a billing arrangement where surplus solar power you export to the grid is credited against your consumption, effectively lowering your bill further. It's a standard part of most on-grid residential installations and is required to claim many state and central solar benefits.
Are monocrystalline panels better than polycrystalline for homes?
For most rooftops with limited space, yes -monocrystalline panels offer higher efficiency per square foot, so you generate more power from the same roof area. Polycrystalline panels are cheaper but require more space to produce the same output, making them less practical for compact urban roofs.
Conclusion: Your Rooftop Doesn't Have to Sit Empty
An unused rooftop is a genuine missed opportunity in 2026 -the technology is proven, the subsidy makes the economics work, and the installation process itself has become far more standardised and predictable than it was even a few years ago. The right first step is a proper site assessment tailored to your roof, your consumption pattern, and your budget. contact us today to get a free consultation and turn your rooftop into a source of everyday, self-generated energy.
Planning solar for your home? rooftop solar installation for homes in Chennai or get a free solar quote.


